Introduction
Here is the second part of my planning, where I took everything from my Initial Thinking, and built upon it creating storyboards, character sheets and adding other elements to help speed up my production process.
I tried my make my planning as detailed as possible, while also fitting in with my pre-made timetable. Unfortunately I wasn't able to fit in everything I wanted to do within the given time, and so I'm using this to learn from my mistakes of giving myself too much work under such little time.
Planning TIMETABLE

CONTENTs
Skill Building
After looking up a collection of tutorials and books to help me with the production of my animation, I started working on building my skills in the software's I planned on using, as well as some animation techniques. Overall I feel as though the various videos and pieces of information I had taken in throughout the days really helped me with the process of making my animation. I have a deeper understanding of Adobe After Effects and Opentoonz. I also know a lot more about the planning of creating an animation, and what professional techniques to use.
Anatomy Practice


Here you will be able to see the additional practice I had done to learn bone and muscle anatomy. As well as breaking down the human body into simpler shapes in order to get the structured down. The book “Anatomy For Artists” by Barrington Barber really helped with this practice, and various Youtube channels on anatomy. However, the book really helped me focus on what knowledge was needed and how the body moves.
Adobe after effects
I have never really used After Effects before, so I made sure to take time to learn what the different buttons on AE did and how the whole editing software works. I want to use After Effects to create my animatic so I know what everything will look like, and to add audio to my final animation. After watching both videos on their own, I then took the 1 hour tutorial and followed along so I had the experience myself. I created a fake video introduction, and although this isn’t so usual for my animation, it really helped me get a handle on the UI and what was possible.


Opentoonz & Animation
When I was practicing my animation skills on Opentoonz, I referred back to the video tutorials on the software to help me navigate the UI, as well as the animation book by Richard Williams to allow me to apply the principles of animation. Overall I made a few short animation gifs to help me get used to animating in Opentoonz, and get me into the flow of animation. I am already quite familiar with the principles of animation, so I didn’t struggle going over that, and I even applied some of the principles in the short animations I have done.


VIDEO REFERENCE
Knowing that, on my own, my animation skills aren’t yet at a level where I can animate most of the scenes I’m planning, I have decided to make some video references of my own. In these videos I myself (or my sister) are acting out what I plan on animating, making the production process a lot easier for myself. From what I’ve learnt about art in general, It’s a must that you use references in order to get something anatomically correct or to build your visual library. Even professionals use references and you shouldn’t shy away from this in fear that it means your not “good at art”.
From what I've seen on creating your own video references, you shouldn't necessarily be wearing a lot of clothing. This is so you're able to see the form of the body when performing the action in the video. I unfortunately couldn't do this because my and my sister were at a park, running. However the videos are still quite helpful, and I should be able to make educated guesses on the anatomy.


Storyboard
To give myself a rough idea of what’s going to conspire in the animation, I wrote a rough script on each event, while thinking of the changes I’ll make according to my actual artistic ability.
-
Still shot of the top of a wall - after a couple seconds a girl suddenly jumps over it.
-
Far shot - girl runs up to camera
-
Camera then turns to track the girl as she’s runs to the left. She stops at a wall and looks up
-
The camera looks up with her to view the top of the wall
-
Side shot of girl at the wall - She look from left to right (checking the length of the walk)
-
Close up - girls face with determined look
-
zoom into extreme close at her eyes and brows
-
¾ camera shot of girl getting ready to punch the wall
-
Camera zooms in on her fist and tracks it as she punches the wall
-
The wall acts back at the point of contact and adds more fat to her arm
-
Mid, front shot - Girl backs up and realises what happened
-
Tracking, close up shot of leg - She kicks the wall, and her leg gets chunkier
-
Mid ¾ shot - Even more frustrated she attacks the wall with a fury of uncoordinated punches
-
¾ camera shot of girls back - Her body goes back to normal, but the wall develops an evil looking grin and forms a fist
-
Wall pov shot - The fist punches her in the stomach imprinting a red blotch in that area.
-
Defeated, she knees down. But hears footsteps behind hear
-
Shot of a group of people’s feet walking
-
4 still character introduction shots for Floww, Jessie, Coach Simzz, and the girls friends and family
-
Girls POV shot/over the shoulder shot - Floww reaches her hand out to girl
-
Mid shot - girl gets up from ground, background moves quite quickly. Surprised she looks down
-
As girl looks down the camera tracks downwards to see all the other characters lifting her over the wall (on each others shoulders)
-
Zoomed out - girl hops onto the top of the wall
-
Extreme close up - girl smiles to herself as she faces off into the distance
-
Low angle - girl comes into the view as she jumps off the wall, then leave the camera view as she jumps down.
-
Transition to blank screen, short message comes
-
Adidas logo and title of animation comes up to end animation.

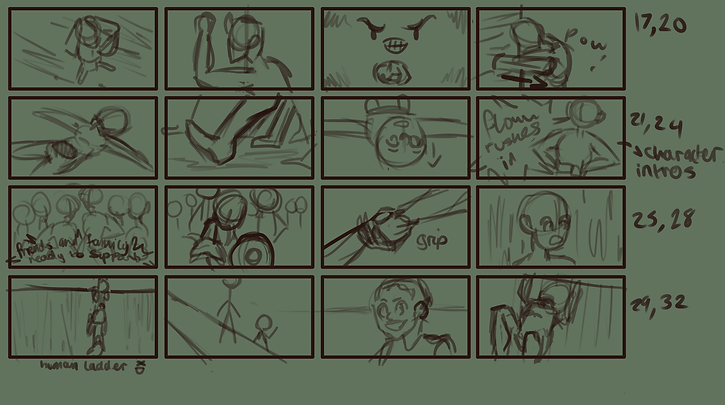
After creating a written script of what I imagine would happen in my animation, I created tiny thumbnails for most of the scenes I want; this will give me a basic idea of what the scene will look like and will get my creative juices flowing. It also allows me to make quick changes very early on; deciding poses and shots quickly without having to redo detailed drawings. I didn't complete the whole animation in these thumbnails as I was practicing using this technique (which I had learnt from the video series “How I Made This / Animation”).

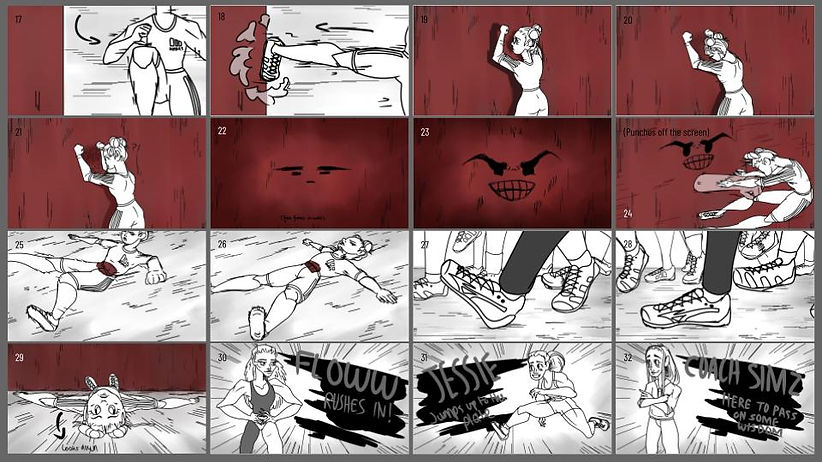
I created another section of storyboard thumbnails, however in a bit more detail. These thumbnails are also finished, compared to the first trial, and show the whole story. I kept the things I liked the same, and changed some of the camera positions for some. This rough storyboard will definitely help me when it comes to the making of my detailed storyboard and animatic.
As feedback, I asked someone close to me whether they could tell what was happening in the storyboard. This will help me with making things clearer in the actual attempt.
When hearing the attempt at depicting the story just from the storyboard alone, I learnt that my storyboard wasn't so difficult to understand and was quite clear for a small rough attempt. Because the drawings were so small, it was tough to draw clear actions. However with the help of notes and arrows I was able to make my thumbnails a lot easier to read.


After hearing about the actual story from myself someone had said that the idea was cute and meaningful, but may be too daunting of a task to animate. “There may be too many messages in this animation. I should keep the message simple.” This made me think about cutting out the body image changing scene, and instead show my characters frustration over not being able to break the wall down. This will keep the length and difficulty down while also still showing how my main character is feeling about this ‘unbreakable’ barrier, emotionally.
All I really need to do now is draw up a cleaner version with a few adjustments.

(I cut out a few scenes here)

Music?
When thinking about my animation, I was wondering about what I should do with the audio, and how much music will be featured in my animation. I really want some sections to be silent, with only an action sound effect coming from the main character and what she’s interacting with. Recording such sound effects will be hard to make sound professional without the proper equipment, but I still think it would be a nice attempt.
As for choosing the non-copyrighted music, I feel as though this is one of the hardest parts of creating an animation. Whether you try composing your own music or at least get someone else to help you out, finding the right music that matches the mood and is timed well with your animation is next to impossible most of the time.
Here I have listed 3 songs that I feel would fit the animation the most. When I have the animation down I’ll start to choose which song and other bits of audio I may record to use.


Backgrounds
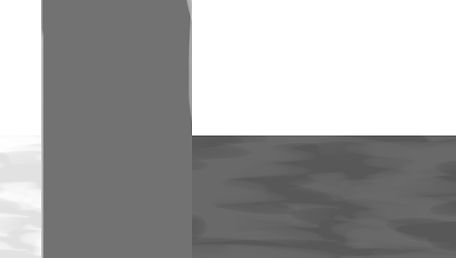
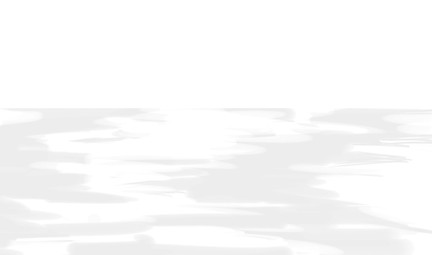
My background ideas aren’t very detailed and are quite simple to carry out. The wall will be visible for a majority of the scenes, and aside from that the background will be nothing but plain white floors.
Because my backgrounds will be so simple, I have decided to add some roughly sketched lines every now and again to show movement, and the direction of the flooring and the wall. This will make sure the viewer doesn’t get confused by the background, and that it’s at least a bit interesting to look at.


ChARCTERS

INSPIRATION
For my art style inspiration, I have decided to look at the designs of Sailor Moon. This old anime is about a group of girls called the Sailor Scouts, who fight for justice. I think drawing inspiration from this show in particular is very appropriate; seeing as the shows protagonists are confident and powerful women, having it as a backing for the design choices in my animation amplifies the message behind it.
The style of Sailor Moon is also quite popular amongst teenage girls; its 90s aesthetic has become quite popular recently; the pastel clothing and backgrounds, with a little grunge effect is a popular aesthetic to find on sites like Pinterest. The big round anime eyes and long majestic legs is another trope that is admired from this anime. Something like this would definitely catch the attention of young girls.

Clothing


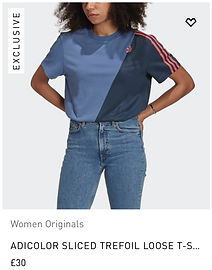


My character will be wearing sports clothing from Adidas, seeing as that is the brand the brief is based on. I went ahead and looked at the different styles of clothing they had on their website and cultivated a mood board of the clothing I liked the best.
Although it may seem unimportant, sports fashion can mean a lot to young girls doing sports. In fact, Florence Joyner was infamous for showing out at competitions with stylish bodysuits. Showing girls that they can look good while doing sports is an important factor as well.
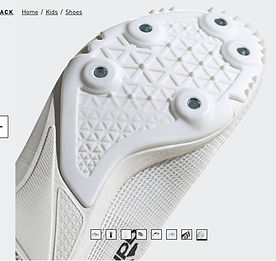
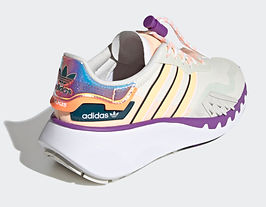
Trainers
I wanted to put a bit more emphasis on the trainers my character wears, seeing as the type of trainers you wear are a big part of sports, and the Adidas brand. I once again went onto Adidas’ website to find some “track and field” trainers. The main character is seen running a lot and jumping over hurdles, so why not make her an athlete who specialises in running activities. Track and Field trainers have a specific characteristic: they usually have spikes on the bottom of the soles. This can be seen with some of Flo Jo’s trainers as well. The spikes are there to secure your feet if walking on slippery surfaces, so these would be very useful when running at an extreme speed; making the user very secure.


Hair styles


The last detail I wanted to focus on was the hairstyle. Naturally I would want a hairstyle that didn’t get in the way, as is advised when doing sports or any active work.
The hairstyle will be simple, reflecting a young teenage girl who just wants her hair out of the way and nothing fancy; however with some personality to it. A hairstyle done that isn’t so neat, but not so messy to make her look unorganized and lazy. Something that shows how the main character is an active, strong headed girl. A lot of this hairstyles aren’t exact representations of what I would like for my main character, but more of a group of ideas to get me creative.
Main
ChARaCTERS
To start off with all of my character designs I made rough sketches first. I based the sketched out designs on my mood boards and all the previous research I had done before hand,


Silhouette
When coming up with a good character design, it is known to use silhouettes first, to build up the characters recognisable shape before worrying about details inside that silhouette. I decided to use this method when designing my main character, to give me a feel of professional character designing.


When it came to the full body silhouettes the focus was meant to be put on the body designs, the clothing silhouette and the dynamic pose for the character. The most popular choices from my peers where options 2, 3 and 7, 8. According to most of the answers it’s because they best fit the description of the character which was, “a strong headed girl who likes being active”. The powerful stance of drawings 3 and 7 will help with when my character is still in my animation. Poses 2 and 8 where meant to be my character in action so I’m glad the feedback and votes confirmed that they were indeed dynamic and energetic. Clothing isn’t quite visible in the silhouettes, apart from the baggy clothing. However I had some responses saying the “clothes are too baggy, making her seem like she's not active.” As well as another person telling me to make the clothing aerodynamic and appropriate for running fast.
Next was the specific hairstyle silhouettes. I had a range of styles and in the end the 2 most popular designs were options 4 and 6. My personal favourite was 6, for the same reason a lot of people chose 6; “their hair is tied up like they are ready and active but also the tail is short and messy representing how easy it is for her to get frustrated.” 4 was also similar in that aspect however other responses had called it “bubbly and cute”. I plan on making more detailed changes in my final designs as most of the additional criticisms were to make the hairstyles more natural and less polished. People liked for me to keep the short hair as it felt more teenaged, and the rest of the advice went along the lines of “messier hair and less symmetrical”. Messy hair would, “represent how easy it is for her to get frustrated.” It also makes sense for her hair to be messy because of being so active.
All the feedback I had gotten was extremely helpful in narrowing down designs and keeping my main character true to her description.

8

7
Feedback
After Feedback
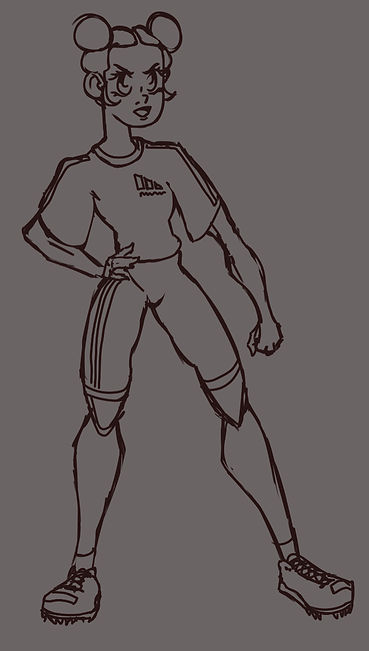
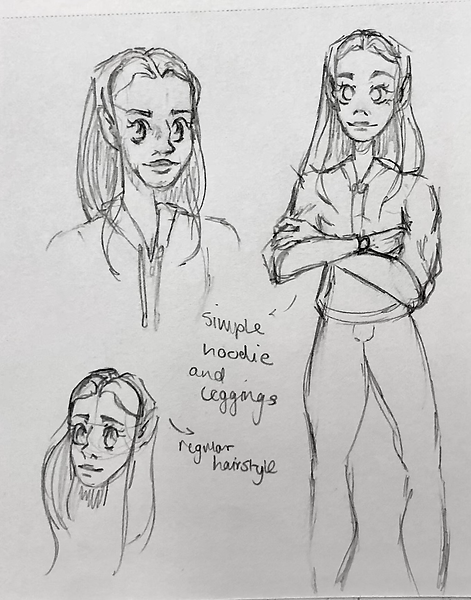
After all the feedback I had gotten from my survey I went forward with sketching some detailed sketches of what my final character would look like. I also used my various research on Adidas clothing and trainers to give my main character stylish but simple sports clothing. Also using my art style inspiration to add noticeable characteristics to my designs. I asked a select few of people for which hair and outfit design they preferred the most, and why.
Amore had said hairstyle 1 was her favourite as it was the most interesting and detailed. It’s combination of ideas 2 and 3 was clever and gives the overall design more character.
For the outfits, she liked 2 the most, saying the open sleeves leaves room for movement. The shorts and top also best represents adidas clothing. However, when comparing practicality Amore had said she liked idea 1 as the tight-skinned top and shorts set made it the most appropriate for running.
Similar choices was made by my peer, Holly. Her favourite hairstyle was also 1, saying it was just the design she preferred the most. Holly also mentioned how well my designs reflected my feedback in the survey, “I took into consideration the symmetry and messiness of the hair, creating a believable teenage girl who’s into sports”.
As for her choice of outfit Holly also chose design 2, but requested I make it more aerodynamic like design 1.


From the additional feedback given, I had my final design ready and was onto creating my character sheet with a turnaround and some facial expressions. Creating this character sheet was also good training for me; making sure that nothing noticeable changes on the character when redrawing them multiple times.

Floww

Sketches
Here are a few sketches a made to experiment with the style I wanted to draw Flo Jo in. The idea behind the design has already been given to me through my researching of pictures, so all I had to decide was how I was going to draw her hair, eye shape and body shape.
I’ll be keeping her iconic 1 legged pant-suit look.


Final
Character sheet

Jessie

Sketches


Final
Character sheet

Coach T Simz


Unfortunately, there aren’t many pictures of Stacy Sims, so I had to make do with these few images.
Sketches

Final
Character sheet

Style Sheets


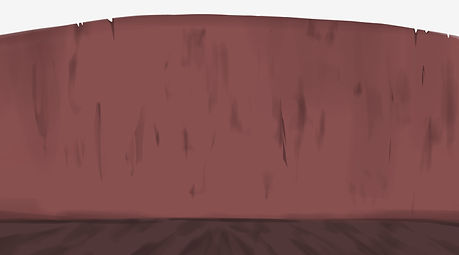
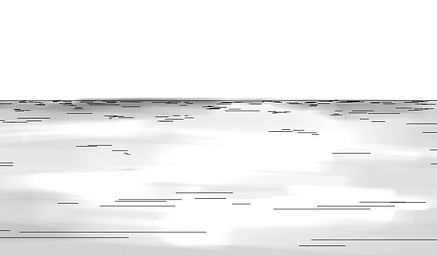
To get the art style for my animation down, I created various style sheets for my peers to choose from in a survey. I really wanted to keep the use of these 'action lines' that are scattered strategically in the background and on the wall. I feel as though these lines add detail to the plain background and help give the black and white scene flare. I have made 2 style sheets and have made a survey for my peers to answer, choosing which style they preferred and asking if they had any suggestions for me.
The most favoured option was option 2, as its action lines "emphasise movement" and "makes the background clearer", as some of the responses said. I had quite a few people tell me that option 2 was fine as it was however, some of my peers suggested that I keep the wall texture in option, but combine the action lines from the background in option 2. They had said the background was enough in showing the flow and direction of the character and that the "stylistic choice for the wall in option 1 might create an interesting art style."
With this feedback I have decided on 2 final styles. Whenever I'm animating the background (wall) moving, I will add many action lines to show movement. But when the background is still and doesn't require such detail, I will use the art style from the new style sheet I created to help me reduce work load.
I had created this new style sheet after receiving feedback, to show that I was indeed listening to the suggestions given to me.
FINISHED STORYBOARD
I went back and looked at my old storyboard, as well as all my character sheets to create my final, cleaned up storyboard.
Not only did I apply the characters designs, backgrounds, correct art style and small arrows/noted as to what will be happening, but I also made a few changes; cutting out parts that weren’t entirely necessary to keep. Overall I had 50 images in my official storyboard, and decided to use these images to create an animatic. Not only would the animatic help me decide on the editing early on, but it would also help me figure out how long each scene would be animated for. Also, I spend quite a long time on these still drawings so I tried to use them as much as possible.
In the end I had cut out the opening sequence that featured my MC (main character) jumping over a wall. Initially this was to show her getting over one barrier, which would then lead into a smooth transition as she runs up to her next barrier. However I later realised this scene wasn’t actually needed; so to shorten the time of my animation and the time I would spend animating, I cut out the scene entirely.